Introduction
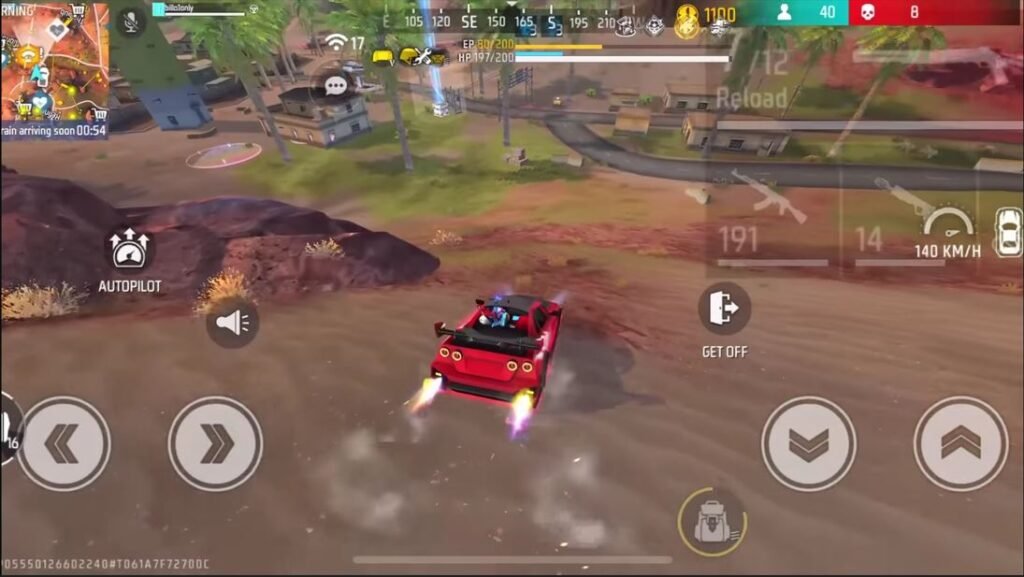
The Four-Claw, also known as the 4-Finger control, is essential for Free Fire Battle Royale players aiming to improve performance. Your HUD (Heads-Up Display) layout affects movement, aiming, and reaction speed. A well-designed 4-Finger setup can be the difference between an early knock-out and securing a Booyah.
Poorly arranged HUDs can slow reaction times, reduce accuracy, and create confusion in intense firefights, especially when switching between Android and iOS. In contrast, an optimized 4-Finger layout enhances movement, combat control, and responsiveness in both ranked and classic matches.
Debates exist about which control style 2, 3, or 4 fingers is best. While 4-Finger controls enable advanced multitasking, skilled players can excel with three fingers. With the right layout and sensitivity, you can crouch, jump, aim, and fire almost simultaneously. The 4-Finger setup offers precision, comfort, and faster reflexes, though it may feel challenging initially.
This guide explains how to create and master a 4-Finger HUD layout suitable for smartphones (not recommended for tablets).
Why Choose the 4-Finger Layout?
The 4-Finger layout is popular for its simplicity, comfort, and accuracy. It allows players to focus more on aiming and movement rather than managing too many buttons. Professional players prefer it for fast rotations, close-range combat, and precise control.
Using the 4-Finger setup allows faster reactions in surprise encounters. Tasks such as aiming, grenade throwing, weapon switching, or placing a Gloo Wall can be done seamlessly while moving, giving a tactical advantage in ranked and casual matches.
While many Free Fire players stick to 2-finger controls for ease, 4-Finger layouts are perfect for players seeking improved mobility and quicker in-game responses.
NOTE: Do not copy someone else’s HUD. Customize button positions and sizes to suit your screen, thumb reach, and comfort. Test adjustments in training mode to ensure your setup feels natural and allows smooth transitions between actions.
Understanding the 4-Finger Claw Setup
The 4-Finger setup uses the left thumb, right thumb, left index and right index finger to manage nearly all in-game actions. This setup is designed for mobile players who want speed and precision. Mastering it improves reaction times, aiming accuracy, and overall gameplay performance.
FAQ: Which control is best 2-Finger, 3-Finger, or 4-Finger?
While pro players can succeed with 2 or 3 fingers, 4-Finger controls allow faster multitasking and smoother movement during combat. The main challenge is adjusting to button separation for aiming. With practice, 4-Claw layout setups offer superior speed and control in free fire.
Perfect 4-Finger Custom HUD In Free Fire for iOS and Android
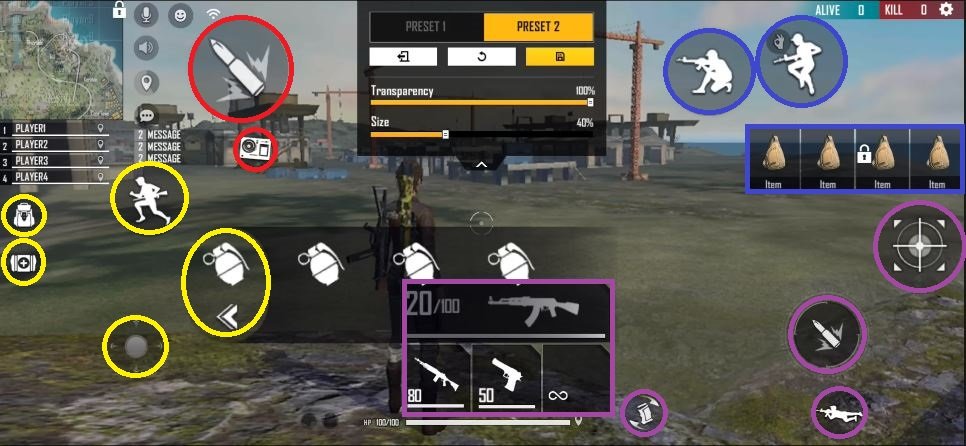
1. Left Thumb Role
- Controls: joystick, grenade throwing, running, medkit usage, backpack access.
NOTE: Place the joystick comfortably for your thumb’s natural movement. Ensure grenades and medkits are reachable without lifting your thumb off the joystick. Practicing in training mode helps you throw grenades while moving smoothly, preventing awkward delays during enemy encounters.
2. Left Index Finger Role
- Controls: left-side firing button, character ability.
NOTE: Position your left index finger so it can fire continuously without covering other essential buttons. This is especially useful in mid-range fights where sustained shooting is needed while moving. Test abilities like character skills (e.g., K’s Jiu-jitsu or Chrono’s shield) to ensure they activate quickly without disrupting movement.
3. Right Thumb Role
- Controls: gun selection, reloading, prone, right-side firing, ADS (Aim Down Sight).
NOTE: Right thumb buttons must be close enough to switch weapons instantly and aim down sights while moving. Practice quickly reloading after firing, using ADS for precise headshots. Adjust button size so accidental presses are minimized, but accessibility remains fast during intense fights.
4. Right Index Finger Role
- Controls: jump, crouch, looting items.
NOTE: Maintain enough spacing between jump and crouch buttons for fluid movement. During real matches, jump while dodging bullets or crouch behind cover while shooting. Position looting buttons for quick access during rushes—this ensures you can gather resources without slowing your attack or movement.
Mastering the 4-Finger Claw Setup
Start with friendly matches to get accustomed to the layout. Initially, it may feel awkward, but consistent practice improves speed and precision. Spend 10–12 minutes daily in training mode to build muscle memory for finger placement and button timing. Begin with unranked or Clash Squad matches to practice movements before ranked battles.
NOTE: Gradually adjust button sizes and opacity, but do not change positions once your fingers are set. Sudden changes disrupt muscle memory and slow reaction times. Consider small tweaks to practice comfort, like reducing joystick diameter or slightly moving the jump button for better reach.
Addition, you can read:
Best Rusher Guns in Free Fire: Top 5 All-Time Favorites
Best Headshots Sensitivity In Free Fire: Pro Setting
Conclusion
Mastering the 4-Finger control in Free Fire Battle Royale requires patience, consistency, and careful HUD customization. Once accustomed, it enhances reaction speed, aiming accuracy, and overall gameplay. A personalized 4-Finger layout gives a competitive edge, smoother movement, and more confident performance in both classic and ranked matches.
Pingback: Best Combo in Free Fire CS Ranked Guns: Top 3 For Clash Squad - exploremultiverse.com
Hussain
Your mode of explaining everything in this article is genuinely fastidious, every one be able to
easily be aware of it, Thanks a lot.